05/02/2019
 Fig 55- Outdoor Porches. https://www.pinterest.co.uk/stewartmarr/house-outside-porches/
 Fig 56- Outdoor Porches. https://www.pinterest.co.uk/stewartmarr/house-outside-porches/
 Fig 57- Outdoor Porches. https://www.pinterest.co.uk/stewartmarr/house-outside-porches/

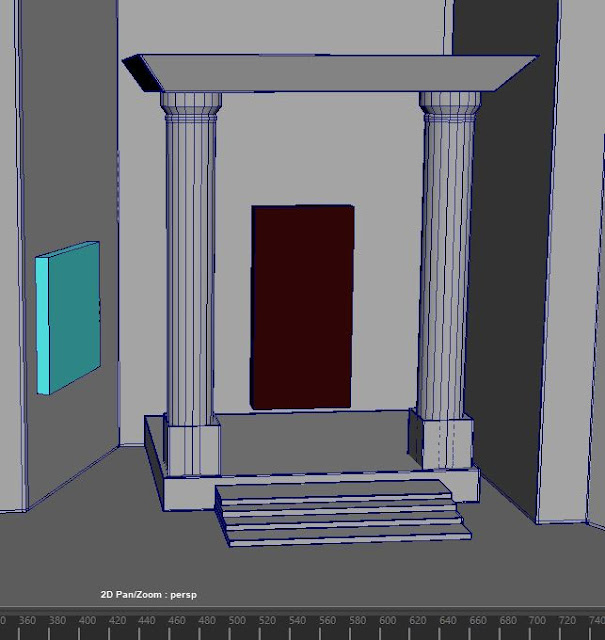
 Fig 60 - Apex Design. https://www.pinterest.co.uk/stewartmarr/house-bay-windows/
 Fig 61 - Apex Design. https://www.pinterest.co.uk/stewartmarr/house-bay-windows/

 Fig 63 - Apex Design.

 Fig 65 - Chimney. https://www.pinterest.co.uk/stewartmarr/house-chimneys/
 Fig 66 - Chimney. https://www.pinterest.co.uk/stewartmarr/house-chimneys/


House Development
Today's session was a continuation on the house model development in terms of adding further details to the model house.
Further detail was added today in terms of the outside porch, by working on the columns and steps. Using reference images of houses built of the same time period a outdoor porch was given more details to replicate the reference images, as can be seen in figures 55-58.


Fig 58- Outdoor Porches. https://www.pinterest.co.uk/stewartmarr/house-outside-porches/
From using the reference images in figures 55-58, similar style porch was created for the house, adding detail to the columns and adding steps leading to the front door, as seen in figure 59. The columns details were done by extruding the top elements to give a rounded look as seen in figures 55-58 and square blocks were added at the base of the columns. Square blocks were also reshaped and downsized to create the steps leading to the front door.

Fig 59 - Outdoor Porch.
The next section of the house to be changed was the apex's over the front two bay windows. As with the outdoor porch, using reference images as a guide to the style of architecture used in the 19th century. This again was done to add further detail and create authenticity to the model, by using the images in figures 60-62 as reference.
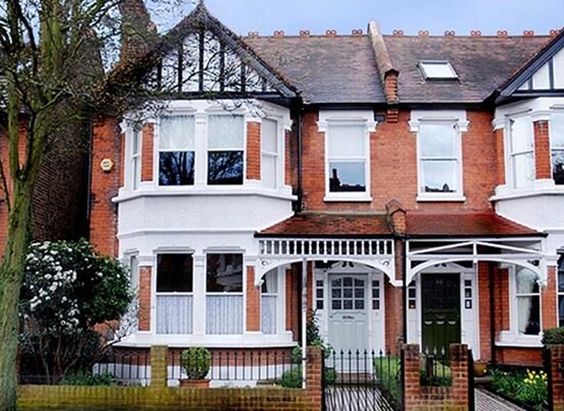


Fig 62 - Apex Design. https://www.pinterest.co.uk/stewartmarr/house-bay-windows/
Using a similar style in figures 60-62, apex's front faces were extruded inwards and then given reshaped cubes pointing forwards to give the illusion of the wood panelling used in the reference images, figures 60-62, as can be seen in figure 63 and 64.


Fig 64- Apex Design.
There had been problems with the apex re-design initially do to extra edges and double faces. This was resolved the help of a course tutor helping to find the extra edges and doubled faces which has become hidden.
Another change was made to the chimney. Rather having the chimney as one large block, detail was added by changing the shape slightly. As with the apex and outside porch, reference images were used to change the chimneys shape in order to keep accurate to architecture from the 19th century.


Fig 67 - Chimney. https://www.pinterest.co.uk/stewartmarr/house-chimneys/
Using the reference images in figures 65- 67, the house's chimney shape was altered accordingly, as can be seen in figure 68.

Fig 68 - Chimney.
The last addition to the model today was the start of adding guttering and drain pipes to the roof of the house. This was done using a cylinder and deleting half the faces and then sizing down the pipe in scale with the roof, as can be seen in figure 69.

Fig 69 - Guttering.

Comments
Post a Comment